Toy Hat
Sock Monkey Wizards Hat
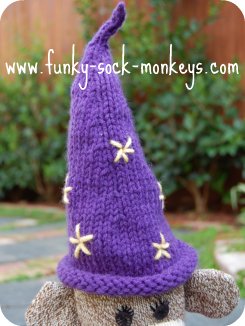
How to knit a funky wizards hat with free knitting hat patterns - toy hat size. Super cool wool knit hats to add to a wizard costume, even Harry Potter would be proud.
This is a great hat pattern for kids, it's very simple and doesn't take too long to knit. You can use any color wool you'd like, and embroider on designs: stars, moon. Add a cape, some clothes or even a wand (a tiny stick would do the trick).
Wizards Hat Knitting Pattern
Stuff you need:
Worsted yarn (double knit wool)
Purple yarn
Yellow yarn
Size 8 knitting needles
Wool Needle
Scissors
How to make the Wizards toy hat:
Cast on 40 stitches in purple yarn
Stocking stitch 18 rows (knit a row, purl a row.......)
Row 19: k2tog, k8, k2tog, k8, k2tog, k8, k2tog, k8 (36 stitches)
Stocking stitch next 3 rows
Row 23: k2tog, k7, k2tog, k7, k2tog, k7, k2tog, k7 (32 stitches)
Stocking stitch next 3 rows
Row 27: k2tog, k6, k2tog, k6, k2tog, k6, k2tog, k6 (28 stitches)
Stocking stitch next 3 rows
Row 31: k2tog, k5, k2tog, k5, k2tog, k5, k2tog, k5 (24 stitches)
Stocking stitch next 3 rows
Row 35: k2tog, k4, k2tog, k4, k2tog, k4, k2tog, k4 (20 stitches)
Stocking stitch next 3 rows
Row 39: k2tog, k3, k2tog, k3, k2tog, k3, k2tog, k3 (16 stitches)
Stocking stitch next 3 rows
Row 43: k2tog, k2, k2tog, k2, k2tog, k2, k2tog, k2 (12 stitches)
Stocking stitch next 3 rows
Row 47: k2tog, k1, k2tog, k1, k2tog, k1, k2tog, k1 (8 stitches)
Stocking stitch next 3 rows
Row 51: k2tog x 4 (4 stitches)
Stocking stitch next 3 rows (we are making the point at the top of the hat now)
Row 55: k2tog x 2 (2 stitches)
Stocking stitch next 3 rows
Row 59: k2tog x 1 ( 1 stitch)
Stocking stitch next 3 rows
Tie off, leaving a long thread of black yarn which you will use to stitch the hat together.
With yellow yarn stars can be stitched on to the Wizards hat, they can just be randomly placed and made any size.
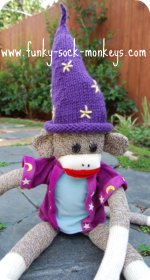
Stitching the hat together:
instead of turning the hat right side in to sew it together you need to have the hat right side out.
This is because of the point at the top of the toy hat, if the hat is sewn together right side in, you may have a super hard time trying to pop the point of the Wizards hat out.
I find it is much
easier to have the hat right side out and thread the end of my yarn down through the
top of the point (pull the thread right through but don't pull it tight or you will lose
the point of your hat), weave the thread back and forth through the rows, then start
sewing the sides of the hat together.
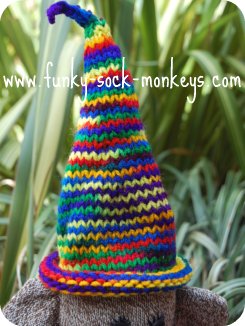
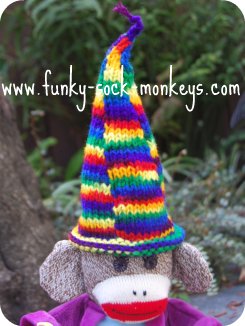
In these pictures you'll see two Wizard's hats that were made using the same pattern shown above. I used the same multi colored yarn to do both of these hats.
The one on the left was made by casting on 40 stitches and working right across each row as you normally would.
With the Wizard's toy hat on the right I cast on 40 stitches and began to knit as usual right across each row.
After knitting four rows I used 4 separate pieces of wool (I made 3 small balls of wool before I began to knit and used the original ball = 4) to knit a section of 10 stitches each. This creates a funky panelled look - rather groovy really!
Also instead of leaving a long piece of wool to use to stitch the hat together I just cut it off a few inches long , tied a knot in it, trimmed it a bit shorter and left it sticking up as the top of the hat.
Swing from Wizards Toy Hat to Knitting Hat Patterns


